Liquid tomato fertilizer is a great choice for backyard gardeners. You can easily feed your plants the basic nutrients, micronutrients, and other essential minerals through liquid fertilizer.
Many beginner gardeners spend a lot of money to buy this liquid fertilizer from gardening stores or online shops without thinking twice. But, truly speaking, it is pretty much easier to make your home version than you think.
You can simply get your own liquid fertilizer by using your kitchen waste, lawn waste, manures, and other available groceries at home.
In this article, I will explain to you the best DIY liquid fertilizer recipes for your home garden.
So, let’s start!!!
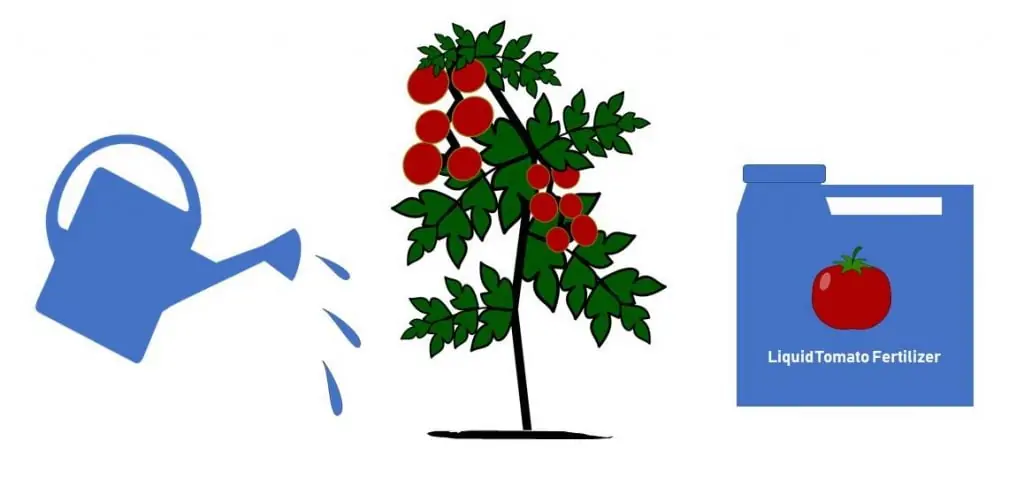
What are the benefits of liquid tomato fertilizer?
- It supplies both nutrients and water to the tomatoes at the same time
- Making process is easier than traditional organic fertilizer
- Supply quick nutrients to the tomatoes comparing dry fertilizer
- The easiest way to provide nutrients to your plants.
- You can use it as a foliar spray or directly apply it at the base of the plants.
- You can apply it through your present watering methods for tomatoes, like drip watering, cone spikes watering, bottle watering, and other watering methods.
- Best utilization of garbage nutrients
- Save additional spending on water.
- Tomato plants can absorb nutrients easily from the soil.
- No risk of over-fertilization unless applying chemical fertilizer.
Recipe #01: How to Make Epsom Salt Liquid Fertilizer for Tomatoes?
Benefits:
- Epsom salt is a natural source of magnesium and sulfur.
- Magnesium turns your plant leaves deeper green color and prevents yellowing leaves.
- As well as, sulfur develops root growth, protects from cold, and produces protein, and enzymes for healthy plant growth.
- Moreover, it helps bloom flowers and produces sweeter fruits.
- Reduces the transplanting stress
- Nightshade family plants like tomatoes, eggplants, and potatoes produce greater yields when they feed Epsom salt.
Required ingredients and tools:
- Epsom salt and freshwater
- 1-gallon container or sprayer, a tablespoon
How to make:
You can apply this as foliar spray or soil nutrients at the base of tomato plants.
- As soil Nutrients-Put 1 tablespoon of Epsom salt in a gallon of water for a plant with 1-foot height. And 2 tablespoons for 2-feet height plants.
- As sprayer- 1 tablespoon of Epsom salt for the 1-gallon sprayer and apply it directly to the foliage.
When to apply:
You can use Epsom salt for tomatoes in different stages of their plant growth like:
- At first, during the transplant, your plants
- Secondly, when they begin flowering
- And finally, when the plants set their first fruits.
How often to apply:
Every 2 weeks to 4 weeks later, based on your plants’ feedback.
Where to buy Epsom salt:
Grocery stores, pharmacies, gardening stores, or online stores.
Epsom salt price:
A four-pound container may cost around 3-4 dollars. So, it’s very cheap, less than a dollar for 1 lb.
How many times do I need to apply Epsom salt during a growing season?
- Make sure your soil got magnesium deficiency through a soil test.
- However, if you determine to test Epsom salt in your tomatoes, take a gallon of water and put 1 tablespoon of salt in it.
- Then pour the water at the base of the plants very slowly and carefully.
- If you see the foliage appear lusher and deeper green color in a few days, then continue the salt.
- Don’t apply Epsom salt more than 3-4 times during a growing season.
Recipe #02: How to Make Fish Emulsion Fertilizer for Tomatoes at home?
Benefits:
- It is a great nutrient supplier for tomato plants.
- The fish emulsion contains enough phosphorus, nitrogen, and potassium for tomatoes.
- It also contains some micronutrients like magnesium, calcium, and sulfur.
- Stop blossom end rot of tomatoes.
- Slow-released fertilizer provides nutrients over the season without over-feeding altogether.
- Also, your plants can get some quick nutrients from the water-soluble fertilizer.
Required Ingredients:
Fish guts or leftovers, including equal portions of bone parts and soft parts, seaweed or kelp, and blackstrap molasses. These are the basic ingredients you just need to make a balanced fertilizer.
Besides, you can also add high-quality compost, coffee ground, crabs, and Epsom salt according to your soil demand.
Required tools:
Five-gallon container, depending on your demand, a stick to stirring up the mix.
Measurement of the mixture:
- 1-part fish waste with 5 parts of water. You can also put more fish guts on the composition to get a better result.
- 2-3 cups of chopped seaweed or kelp for poor soil and ½ of a cup for average soil.
- Add ½ cup of blackstrap molasses to provide sugar in the combination for easy fermentation.
How to make:
First, take a 5-gallon container and create a tiny hole at the lid of the container to let the gas come out. You can also drill a tiny hole in the upper side of a container.
Make sure the hole is small enough so that flies cannot enter into it and protect it from rainwater.
Put 1 part of fish guts and 5 parts of water on it. Add 3 cups of seaweed or kelp and ½ cup of blackstrap molasses and stir them up properly with the stick.
You can also add 1 tablespoon of Epsom salt and some crabs to it. Moreover, add 1-2 parts of compost to get a super nutrient fertilizer from the mixture.
Cover up the container and keep it as far as possible from your home. You should stir up the mixture several times for the first two weeks.
Homemade fish emulsion works better for up to 12 months. After that, you should start a new batch.
Toss the leftovers of the fermented emulsion into the compost pile after getting the strained liquid.
[Caution: Fish emulsion produces terrible smells during fermentation.]
Where to apply:
You can apply it directly to your plants or soil.
How often to apply:
- Three tablespoons per gallon of water to apply in the soil once a month.
- 1 tablespoon per gallon of water for foliar spray once or more a month. Remember always apply the foliar spray in the morning before the day becomes heated.
When to apply:
It works better during the transplanting of your plants but also performs well the rest of the growing season.
Where to get fish guts:
Save your cooked or fresh fish guts in the freezer until you have a good amount of worth. You can also collect the fish guts from the nearest restaurant, chain stores, or neighbors.
Commercial fish emulsion price range:
It will cost you around 15-40 bucks based on the quality and the brand.
The time duration for making fish emulsion:
At least three weeks, but three months is better.
# How to get rid of the bad smell of fish emulsion during fermentation?
Fish emulsion undoubtedly provides high-quality nutrients to your garden plants, particularly tomatoes.
But the problem is, it smells very bad when you are going to make some at your home. Not even you, but also your family and neighbors are not going to like this in your backyard.
So, it’s a big challenge for you if you can’t manage a quiet remote place to make this fish emulsion. As a result, commercial fish emulsion would be your next choice if you wish to apply it in your garden.
But you can use a simple trick to avoid this problem and make your own fish emulsion at home.
To do that:
- Take a 12-feet-long and 1-2-inch diameter plastic PVC pipe
- Dig a deep hole in your backyard higher than the plastic drum or container you determine to make your fish emulsion.
- Make a hole at the lid of the drum or container according to your PVC pipe and properly stick it into the hole with gum.
In addition, attach an elbow pipe at the outside edge of the PVC pipe and tie up a net so that rainwater, flies, and other insects can’t enter the pipe.
- Set the drum inside the hole and cover it up with enough soil. Give a stake near the PVC pipe to keep it strong.
- Now, let your fish emulsion do the rest.
I believe this simple trick can solve the bad smell problem of making fish emulsions during fermentation, as mine. Moreover, long-time fermentation (around three months) of the emulsion slightly reduces the bad smell effects.
# Can I use cooked fish leftovers for making fish emulsion?
Yes, you can use the leftovers of a cooked fish for making a fish emulsion. Cooking the fish won’t change the nutrients’ values like fermented fish.
# Which one is a better homemade fish emulsion or commercial fish emulsion?
My answer is a homemade fish emulsion. Yes, there has a lot of supportive reasons behind my statement, such as:
- Both of them got a fishy smell that you can’t avoid
- It’s cheaper or almost free, whereas commercial emulsion costs a handsome amount of money
- Got better quality and nutrients than commercial fish emulsion
- Contain active beneficial bacteria which don’t exist in commercial fish emulsion containers due to the long way shipping process.
Recipe #03: How to Make Banana Peels Liquid Fertilizer for Tomatoes?
Benefits:
- Banana peels contain a good amount of potassium, phosphorus, calcium, and other traces of minerals.
- It works better in slightly acid-loving plants like tomatoes.
- It helps to prevent blossom end rots.
- In addition, it develops the root system and helps healthy blooming.
How to make:
- Take a pot that contains 2 quarts of water
- Cut 4-6 banana peels into ¼ inch pieces and put them in the pot
- Pour a quart of freshwater or rainwater into the pot
- Keep the pot in the dark place for three days to ferment
- After three days, the liquid will be ready to use
- Strain the blend to get the pure liquid, and toss the leftovers into your compost pile
How to use:
Add two cups of banana peel liquid in a gallon of water and apply it once a week directly to the soil.
You can also use it as a spray. To do that, add one cup of liquid to a gallon of water for foliar spray.
Recipe #04: How to Make Potato Peels Liquid Fertilizer for Tomatoes?
Benefits:
- Potato peels are a great source of potassium, calcium, iron, and other nutrients.
- Make the roots strong and fight against diseases.
- Help in flowering and fruiting.
How to make:
- First, take peels from four medium size potatoes
- Then, keep them in a pot and pour a quart and a half of water
- After that, boil the water for 10 minutes
- Finally, let it cool and strain the liquids in a container
How to use:
- For spraying on plants, add one cup of liquids with 1 quart of water.
- For direct application to the soil, add four cups of liquids with 1 quart of water.
- Apply this fertilizer to the plants every three weeks later for a better result.
Recipe #05: How to Make Liquid Seaweed Fertilizer for Tomatoes?
Benefits:
- It contains all the beneficial nutrients for tomatoes, like nitrogen, potassium, magnesium, zinc, and iron.
- Performs better for your indoor plants, seedlings as well as outdoor plants.
- Homemade liquids are more cost-effective than the store brought seaweed fertilizers.
- It helps to develop hearty plant growth and keep away pests and diseases on fruits and flowers.
- It helps to solve root problems.
Why should I make my own seaweed liquid fertilizer at home?
Typically, if you buy 1 quart or 32oz of seaweed liquid from gardening stores, it will cost around 12-15 dollars.
On the other hand, a big bag of seaweed will cost around 8-14 dollars at your local Korean market, and you can make around 2-3 gallons of fertilizer out of it.
So, you can produce at least 8-quart of liquid seaweed fertilizers at home by spending 15 dollars, whereas you have to spend the same amount of money to buy 1 quart of commercial liquid seaweed fertilizers.
How to make:
- Step 1: Get some dried (not roasted) seaweed or kelp to make your liquid fertilizer.
- Step 2: Wash them properly to make sure there is no salt
- Step 3: Take 4 cups of seaweed or kelp to make your water-soluble fertilizer
- Step 4: Chop them as little as possible to extract nutrients into the water. Besides you can also blend them properly to extract.
- Step 5: Take a gallon of water and put the chopped seaweeds in it for 3-4 weeks to extract properly.
For blended seaweeds, it will take a shorter time, around 3-5 days, to extract the nutrients into the water.
- Step 6: After soaking, strain the seaweed and transfer the solution to a container.
The aged liquid will be a little bit smelly after 3-4 weeks. So, keep it outside of your house.
***If you want a smell-free kelp liquid fertilizer for your indoor plants, use the blended liquid after 10-20 hours of extraction.
How to use:
Take one-part seaweed or kelp liquid and one part of the water in your watering can. Apply it to your tomato seedling or matured plants to provide the necessary nutrients.
You can also apply the liquid fertilizer in both ways, like foliar spray, or directly apply it to the soil. Nevertheless, the foliar spray works 10 times better than when applied to the soil.
Apply the solution every two weeks later to the tomatoes. Moreover, apply it 10 days before harvesting to keep your fruits fresh for longer.
Recipe #06: How to Make Liquid Fertilizer from weeds?
Benefits:
- It provides all the necessary nutrients to your plants, such as nitrogen, phosphorous, potassium, calcium, sulfur, manganese, magnesium, and other micronutrients and minerals.
- Easier to source the ingredients.
- Proper utilization of the nutrients of your garden weeds.
- Completely organic fertilizer.
- No need to buy expensive commercial fertilizer.
Ingredients and tools:
- A 5-gallon container or as you require.
- All sorts of weeds (especially deep-rooted stuff, comfrey, yard trimmings, wild fennel plants, thistles, dandelions, and other weeds available in your area). Try to get the entire plant out of the soil, including tap roots.
- Avoid nightshade families like tomatoes, eggplants, peppers, and potatoes due to containing fungi and pathogens.
- Freshwater or rainwater.
How to make:
- Take a 5-gallon container.
- Chopped the weeds for better soaking the nutrients into the water.
- Fill the container with 1 part of chopped weeds and 5 parts of water.
- Cover the container and steep for at least 4 weeks to get the ideal weed tea.
- The solution will be a little bit smelly, so keep it a few yards away from your house.
- Once you finish your batch, through, the decomposed weeds into your compost pile.
How to use:
Add 1 part of weed tea with 10 parts of water. Then, apply it directly to the soil around your tomatoes and other plants once a week.
Recipe #07: How to Make Homemade Liquid Fertilizer from kitchen waste?
Benefits:
- Kitchen waste provides all the necessary nutrients required for your garden plants.
- It’s very easy to make homemade fertilizer from your kitchen garbage.
- Besides, it’s completely organic and cost-effective.
How to collect kitchen waste to make your homemade fertilizer?
Kitchen waste, like vegetable scraps and fruit peels, contains all the necessary nutrients required for your plants. But it is not possible to get enough vegetable scraps and waste to make a full batch all at once.
In that case, you can freeze your vegetable scraps, fruit peels, and other kitchen waste to collect a good amount of ingredients to make your fertilizer.
Moreover, you can preserve a variety of kitchen waste which will contain different nutrients value to enrich your fertilizer.
Required ingredients and tools:
- Vegetable scraps, fruit peels, water, and other food waste (at least 2-quart of waste)
- A 5-gallon bucket.
How to make:
- Step 1: Chop the ingredients as small as possible.
- Step 2: Put the ingredients into the bucket
- Step 3: Pour 2-gallon of water into the bucket and cover it, and steep for 2 days.
- Step 4: After 2 days, strain the solution from the bucket to another container to apply it to the plants.
- Step 5: You can reuse the blend by pouring the same amount of water for the next seven days
After using it twice, just through the blend into your compost pile and prepare your next new batch.
How to use:
Add 1 part of the solution with 1 part of water and apply it directly to the soil around your plants once a week.
Recipe #08: How to Make Liquid Fertilizer from manures at home?
Benefits:
- It’s a great source of nitrogen and other nutrients.
- Easy making process.
- Develop the soil structure.
Ingredients and tools:
- 5-gallon bucket with a lid.
- Well-aged manure of chicken, horse, ship, or cow.
How to make:
Add 1 part of manure and 5 parts of water to the bucket and cover it to soak for at least 2-4 weeks.
After finishing your manure tea, through the leftovers into your compost pile.
How to use:
Add one part of manure tea with 10 parts of water and apply it directly to the soil around your plants. You can apply this manure tea every 2-3 weeks later.
Recipe #09: How to Make Liquid Fertilizer from boiling water of vegetables and foods?
All the foods you are taking for your meal have some nutritional value. During the process of making your foods, some nutrients may wash out through boiling. If you can hold the boiled water rather than strain them, that would be nice food for your garden plants.
Preserve the water after boiling –
- Vegetables
- Pasta
- Eggs and
- All types of foods need to boil to make food.
How to make:
- Step-1: Let the boiled water cool first.
- Step-2: Sort them into three different categories like vegetable water, egg water, and other foods
- Step-3: Freeze them if you don’t get all types of water at a time.
- Step-4: Take a container as you require and add three parts of vegetable water, 1 part of egg water, and two parts of other boiled water to make a balanced nutrient solution.
This is the easiest recipe to make your homemade liquid fertilizer.
How to use:
Take 1 part of the nutrient solution and one part of freshwater in your favorite watering can. Then, apply it directly to the soil around your plants once a week.
Recipe #10: How to Use Fish Tank or Aquarium Water for Tomatoes?
The fish tank is a tank that usually contains fish. On the other hand, an aquarium is a little artwork of nature that may contain fish, turtles, or even just plants and corals.
However, there has been a lot of debate on the definition of a fish tank and aquarium. But my concern is the water they contain.
Usually, you need to change your fish tank or aquarium water once a month, and your tomatoes gonna love to drink those fish tank wastewater to produce healthy and juicy fruits.
Moreover, this is the best utilization of the dirty fish tank water that usually throughout doing nothing throughout.
Typically, it contains nitrogen, phosphorous, potassium, and other trace minerals, which are very essential for plant growth.
So, if you have a fish tank or aquarium, you are lucky to get the wastewater for your plants also saves you money.
How to use:
Save your fish tank water for tomatoes and other plants.
Add 1 part of fish tank water with 1 part of freshwater to make the solution. Then apply it directly to the soil around your plants and avoid watering on foliage and fruits.
Water them every 2-4 weeks later or while the fish tank water is available to use.
Caution:
- Before using fish tank water, makes sure it is not salty at all.
- Don’t use your fish tank water for plants if you use any type of chemical to control its water pH level, algae, or fish diseases.
Conclusion:
Homemade liquid fertilizers are easy to make, easy to use, environment-friendly, and organic fertilizers above all, it is good for your plants’ health as well as yours.
In addition, it can save you money and convert your daily garbage into nutrient foods for your garden plants.
Hope you apply my fertilizer recipes to your tomatoes and other plants for a better result.
Happy gardening.
|| People who read this article often read
- How To Fertilize Tomatoes: From Planting To Harvest
- How to Make High Nutrients Homemade Fertilizer for Tomatoes
- How to Prune Tomatoes Step by Step Guidelines
- 4 Secret Tips of Staking Tomato Plants
- How to Water Tomato Plants: From Seedbed to Harvest
- 10 Reasons to Pick Determinate Vs Indeterminate Tomatoes
- How to Ripen Green Tomatoes Off the Vine: 5 Helpful Methods
- Six Ripening Stages of Tomatoes by the Fruit Surface Color
- When and How to Pick Tomatoes: Right Time and Way to Harvest
- When Where and How to Save Tomato Seeds: The Ultimate Guide
- How to make a homemade organic potting mix for tomatoes
- 20 Helpful Tips for Pruning Tomato Plants
- How to transplant tomato seedlings safely
- A Helpful Guide to Prepare Soil for Tomatoes
- A Helpful Guide to Grow Tomatoes in Containers
Sources and Citations:
- https://underwoodgardens.com/best-homemade-fish-emulsion/
- https://www.growandmake.com/how-to-make-liquid-fertilizer/
- https://www.stuff.co.nz/life-style/homed/community/97632394/5-homemade-liquid-fertilisers-your-plants-will-relish
- https://www.instructables.com/id/Making-Liquid-Fertilizer-from-Weeds/
- https://www.gardeningknowhow.com/garden-how-to/watering/using-aquarium-water-for-plants.htm