Leaf mold is decomposed leaves mainly used for soil amendment. It develops the soil structure, including the drainage system and water holding capacity, and also uses it for mulching.
This is easy to make, and there is no need for any money but time. Moreover, a pile of leaf mold can reduce your garden cost by half after using them in the soil or potting mix. This is a great substitute for peat moss and has better quality.
So, keep continuing reading to make your own leaf mold.
# 7 Benefits of leaf mold:
Works as a great soil amendment
Most of the time, it is not possible to get the perfect soil structure to start gardening. Nonetheless, these are the most important factors for gardeners to ensure their plants a good quality soil to get the bounty harvest.
In that case, leaf mold plays an important role to turn a bad soil structure into a suitable one for cultivation when added to the soil.
Use for mulching
During hot weather conditions, a 3 to 4-inch mulch of leaf mold can cooler soil inside by about 3-4° F than the surface temperature.
In addition, it can also reduce soil erosion in hard rain as well as reduce the chances of soil-borne diseases.
It also controls the weed, invites earthworms, and keeps the garden soil moist for a longer period of time while used as mulch.
Increases the water retention capacity of the soil
Leaf mold dramatically changes the water-holding capacity after adding it to your garden soil. It can hold water up to 500 times its weight. So, it can easily develop rocky and sandy soil to retain more moisture.
Besides, it can absorb rainwater rather than runoff. Moreover, during hot weather conditions, leaf mold provides the necessary water supply to the plants to avoid the extra stress of extreme heat.
Free soil amendment
Leaf mold is basically a free soil amendment given by nature, and you don’t need to spend any money to have it.
Provides nutrients supply
Depending on the leaf varieties, leaf mold contains various nutrients for your plants.
Red maple, Sugar maple, Norway maple, Red oak, Pin oak, Sweetgum, and Sycamore, and these types of trees contain about 15 essential elements for your garden soil.
Besides, the leaves also neutralize the soil pH when they fall and break down into leaf mold.
Boosts Fruit and Vegetable Yields
Leaf mold helps to produce a higher yield and grow bigger the fruit size. It develops the soil condition to flourish and supplies more nutrients to the plants to produce a healthy harvest.
Produce nature-friendly compost
Leaf mold is a nature-friendly soil amendment. It turns garden waste into a valuable and renewable natural resource rather than going to landfills and producing carbon dioxide and methane gas.
# Challenges of leaf mold
Not available commercially
Leaf mold is not usually available to buy from your nearest garden center, so making your own is the only choice to have it for your garden.
Yes, there have a few local companies which produce the leaf mold commercially, but they are very expensive.
Lengthy making process
Typically, it takes around two years to get a good-quality leaf mold. So, you need patience to get it.
If you are a beginner gardener, it will be very challenging for you to wait for a long time, and you may lose hope.
Not suitable for small gardeners
Making a pile of leaf mold takes time and space. So, it’s a little bit challenging for a small gardener who lives in an urban area. Besides, in an apartment that wants to grow a couple of plants in containers is difficult to get the leaf mold.
In that case, as a small gardener, you can collect some leaves from the roadside parks or roadside trees and fill up a black plastic bag. After that, keep it in a suitable place in your apartment for two years.
Increases soil acidity
Leaves are a little bit acidic, so when breaking down, they increase the soil’s pH level.
If your soil contains a lower acidity level, leaf mold will neutralize it. But if your soil has the normal acidity level, then leaf mold will increase the level higher.
In that condition, do the soil test first in the spring and add some lime to neutralize the soil pH level if required.
# Which leaves should I use for leaf mold or leaf compost?
Autumn leaves are a natural gift for gardeners. They contain trace elements (like iron, zinc, iodine, fluoride, selenium, and copper) which are very essential for your garden soil.
Besides, they also contain calcium, magnesium, potassium, phosphorus, and so many nutrients. But, during the leaching time, they gradually lose those nutrients.
Besides, all leaves don’t contain the equal and same nutrients. So, you need to collect different types of leaves to make better leaf mold and leaf compost.
Good leaves for leaf mold
Good quality leaves hold a lower level of lignin and higher in calcium and nitrogen. A leaf that contains higher lignin can slow down the breaking process of leaves.
- Eastern hemlock, cherry, white ash, elm, hornbeam, birch, poplar, willow, lime, oak, and beech leaves contain a higher level of nitrogen and calcium and are low in lignin.
So, they take a shorter period of time, around 12 months, to turn into leaf mold. You can put them into a mesh bin or wire bin or bag them without shredding them.
- Pine and conifer leaves take a year to break down. But they need water and remixing the leaves once a month to break down.
In addition, they perform better when used as mulch and acid-loving plants.
Bad leaves for leaf mold
Bad-quality leaves contain higher lignin and lower calcium and nitrogen. These leaves take a longer time to break down into leaf mold.
- Deciduous shrubs, sycamore, horse chestnut, hawthorn, maple, and magnolia leaves hold a lower level of nitrogen and calcium and are higher in lignin.
They need 18-24 months to turn into leaf mold and also need shredding.
- Eastern black walnut and eucalyptus trees contain natural herbicides that may prevent the germination of your garden seeds.
- Holly, laurel, photinia, rhododendron, aucuba, bay, and skimmia leaves also take a longer period of time to break down due to higher lignin.
So, you need to shred them, remix once a month and keep them moistened to turn into leaf mold faster.
# How to make leaf mold or leaf Compost
Making leaf mold is the easiest and the lengthiest process of all gardening works. You only need a good amount of leaves and a garden wire bin, as you require.
Put all the collected leaves into the wire bin after shredding and cover the top with a large piece of plastic paper; done!!!
You see, this is super easy.
Now, wait for at least two years to get a perfect pile of leaf mold.
If you need a small amount of leaf mold, put some leaves in the garbage or a black plastic bag. Then create some holes in it and keep it under shade for two years.
Remember, don’t let the leaves dry out. So, you need to moisten them with little water once a month. It helps the breakdown process of leaves earlier.
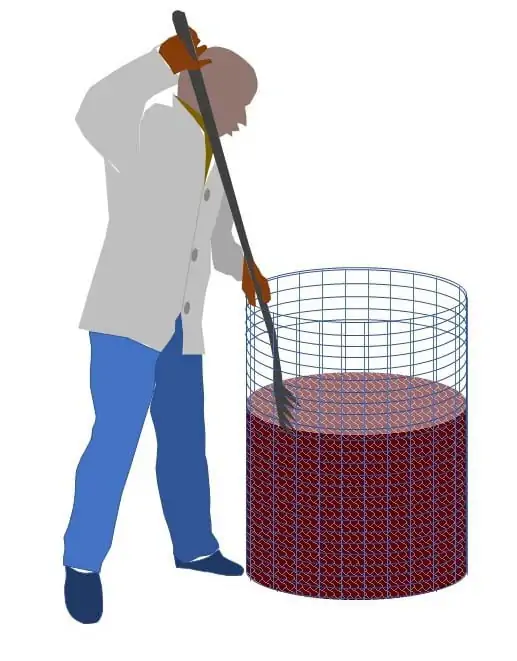
# How to assemble and maintain the leaf mold pile
The size of the leaf mold pile really matters in order to hold moisture. In that case, a 5 to 6-foot diameter and 3 to 4-foot high bin seems to be an ideal size.
You can create your own bin with garden wire or wood frame structure following the ideal size. However, this is not mandatory to create a large bin all the time.
It mainly depends on the demand of your garden space, production range, amount of leaves, and leaves quality.
For a small amount of leaf mold, you can use a medium to a large plastic pot or a garbage bag, or a black plastic bag.
Besides, if you live in dry weather conditions, you need to check the moisture level of the pile once a month and provide some water if needed. A little bit of turning the leaves will boost up the making process.
On the other hand, if you use a garbage bag or black plastic bag, put the leaves into the bag, provide some water to moisten them, and tie them up. Create some holes on the side of the bag for aeration. For containers, do the same process and make some holes in the side of the container.
Cover your large wire bin pile with plastic paper. It will help you to protect the pile from unnecessary garbage dropped by birds. Sometimes it may be poisonous or contain harmful pathogens.
# How to make leaf mold faster
Two years waiting to get leaf mold seems like a long time for any gardeners who want them badly. If you want them quicker, then consider the following things before the start.
Collect good quality leaves.
Good-quality leaves break down earlier than bad-quality leaves. Leaves have higher calcium and nitrogen and lower lignin and waxy coating, typically considered good leaves for making leaf mold.
The best practice is to add both types of leaves and shred them like a mixed salad.
Shredding leaves
Shredding leaves can quicken the process of making leaf mold. You can easily shred leaves using a leaf shredder, leaf mulcher, or running a mower over the leaves.
Provide water and shade.
Pile the leaves under shade to keep them moist longer. Moreover, water them a little once a month to continue the moisture condition.
Keep in mind, don’t let them wet by overwatering. For better results, use cooking water or rainwater.
Add nitrogen and calcium.
Nitrogen and calcium can speed up the making process. They provide foods for microorganisms needed most for making leaf mold.
Besides, all the leaves don’t get the same amount of nitrogen and calcium. So, you need to provide some additional nutrients for your leaves pile.
To do that, you can put some soybean meal, compost, poultry manure, and weed and grass clipping to provide a nitrogen supply. You can also add some egg shells powder to the leaf mold pile to provide calcium.
# How long does it take?
Typically, it takes around two years to get good-quality leaf mold. But it depends on various factors to calculate the exact time range. You can easily get a good leaf mold in 6 months to 12 months if you do the followings:
- Pick up good quality leaves which contain high calcium and nitrogen and are low in lignin.
- Keep moistening the leaves, and don’t let them dry.
- Set up the leaf mold pile in a shaded place to hold the moisture to last longer.
- Check the moisture level of the pile once a month and provide rainwater or cooking water if needed.
- Add grass clipping, weed, poultry manure, and eggshell powder to break down the leaves earlier.
- Shred your leaves is a must before piling them if you want a quick leaf mold.
- Finally, monitor the total process getting well to confirm an early production.
# How to use leaf mold
Use as a soil conditioner
Leaf mold is a great soil conditioner. It helps to develop clay soil, sandy soil, or rocky soil to turn into good-quality soil. It helps to loosen heavy soil, holds the soil moisture, and confirms proper aeration and drainage system.
Use as compost
Leaf mold attracts the earthworm. Add a 3 to 6-inch layer of leaf mold on the ground and let it sit. Earthworms will be appeared in a few weeks and do the rest for your garden.
To get better results, add organic fertilizer to it. Moreover, using a layer of leaf mold on the garden bed each year reduces the need for applying additional fertilizer.
Leaf mold as mulch
You can use leaf mold as mulch. It helps to reduce soil erosion and soil-borne diseases, retains soil moisture, and keeps the soil cool in hot weather conditions.
Don’t put the leaf mold directly at the bottom of the plants. It may harm your plants and invite diseases.
Leaf mold as potting mix
Leaf mold is a great potting mix and a good substitute for peat moss and coco coir. Moreover, it’s a free element of the potting mix, whereas you need to spend some money to get a commercial potting mix.
Conclusion
Making leaf mold is easy as well as time-consuming. But once you get the benefit from it, you can’t stop yourself from making a pile of leaf mold of your own.
So, don’t feel shy to ask your neighbors to get their unwanted leaves. They will be happy and give you thank if you rake their garden lawn.
Sources and Citations: