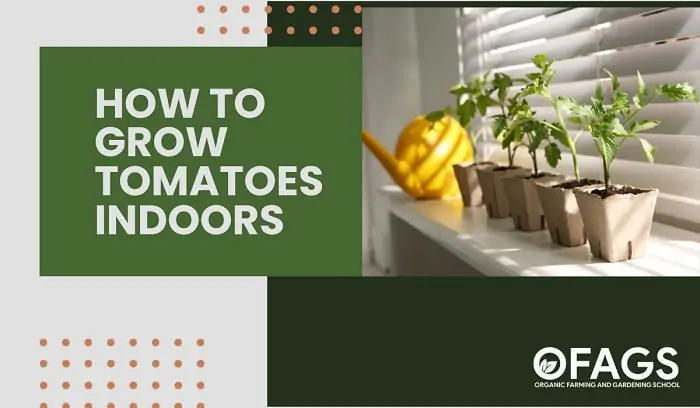
Are you dreaming of juicy, home-grown tomatoes but stuck in a concrete jungle? Fear not! Our guide on Growing Tomatoes Indoors is here to turn your apartment into a mini-Eden. Whether you’re in sunny California or snowy Minnesota, we’ve got you covered. We’re diving into the nitty-gritty of indoor tomato farming – from choosing the right bulbs to whispering sweet nothings to your plants (hey, it might help!). So, grab a cup of joe and let’s get those indoor tomatoes thriving, no matter what Mother Nature’s up to outside!”
At a Glance
- Benefits of Growing Tomatoes Indoors
- Tips to Pick the Right Indoor Tomato Varieties
- Manage Sunlight or Growing Light for Indoor Tomatoes
- Transplanting Indoors Tomatoes
- Picking the Perfect Potting Mix
- Manage Water Supply Challenge for Indoor Tomatoes
- Manage Spilled Water in Potting Trays Indoors
- Ideal Temperature and Humidity
- Feeding Indoor Tomatoes
- Tips to Pollinate Indoor Tomato Plants
- Control Pests and Diseases for Indoor Tomatoes
- Harvesting
1. Benefits of Growing Tomatoes Indoors
Growing tomatoes indoors is an interesting twist on traditional gardening. Here are some solid reasons why folks are turning their living rooms into mini tomato farms:
Controlled Environment:
When you grow tomatoes indoors, you’re basically the weather god for your plants. No sudden frosts to ruin your crop, no scorching summer sun to wither them. You control the temperature, light, and water, leading to potentially healthier and happier tomato plants.
Year-Round Tomatoes:
This one’s a biggie. Normally, tomatoes are like summer tourists, only showing up once a year. But indoors? It’s like convincing them to stay year-round. Fresh tomatoes in winter? Yes, please!
Space Savers:
Let’s face it, not everyone has a backyard the size of a football field. Growing tomatoes indoors is perfect for those with limited outdoor space. A sunny window or a small grow light, and you’re in the tomato business!
Related: How to grow tomatoes in small spaces apartment
Pest and Disease Reduction:
Outside, your tomatoes are more exposed to pests and diseases. Indoors, it’s like they’re living in a protective bubble. Fewer bugs munching on them, less blight, and other diseases that can make a gardener’s life difficult.
The Fun Factor:
There’s something satisfying about plucking a ripe tomato off the vine while you’re still in your slippers. Indoor gardening can be a fun, rewarding hobby, especially when it’s cold and miserable outside.
So, growing tomatoes indoors is not just about getting a fresh supply of these juicy red orbs; it’s about convenience, year-round enjoyment, and turning your home into a little green oasis.
2. Tips to Pick the Right Indoor Tomato Varieties
Whether you’re a seasoned green thumb or a budding gardener, this info’s ripe for the picking!
Determinate (Bush) vs. Indeterminate (Vine) Tomatoes for Indoors
Determinate (Bush) Tomatoes:
Pros:
1. Compact Growth: Ideal for smaller indoor spaces.
2. Easier to Manage: Requires less staking and pruning.
3. Concentrated Harvest: All fruits ripen around the same time, perfect for canning.
4. Less Ongoing Maintenance: Once they’re set up, they’re pretty low-fuss.
5. Predictable Size and Yield: You know exactly what you’re getting into.
Cons:
1. Shorter Production Period: They stop producing after the initial yield.
2. Limited Yield: You might not get as many tomatoes in total.
3. Less Variety: Fewer types to choose from than indeterminate.
4. Quick Turnover: Lots of tomatoes at once, then it’s over.
5. Seasonal Feel: Less of that year-round gardening vibe.
Indeterminate (Vine) Tomatoes:
Pros:
1. Continuous Harvest: Keep picking tomatoes throughout the season.
2. Higher Overall Yield: More tomatoes in the long run.
3. Wide Variety: Lots of different types to experiment with.
4. Extended Gardening Pleasure: They keep growing and producing.
5. Fresh Tomatoes on Demand: Perfect for salads and sandwiches anytime.
Cons:
1. Needs More Space and Support: They can get pretty big, even indoors.
2. Regular Pruning Required: A bit more work to keep them under control.
3. Longer Wait for Initial Harvest: Patience is key.
4. Ongoing Maintenance: They’ll need your attention all season.
5. Can Get Unwieldy: If not managed, they can take over your space.
Related: What types of tomatoes to grow in your garden?
Heirloom vs. Hybrid Tomatoes for Indoors
Heirloom Tomatoes:
Pros:
1. Exceptional Flavor: Often more delicious than hybrids.
2. Unique Varieties: Brings diversity to your indoor garden.
3. Historical Charm: Each variety has its own story.
4. Seed Saving: You can use their seeds for next season.
5. Natural and Non-Modified: Appeals to organic gardening enthusiasts.
Cons:
1. More Prone to Diseases: Heirlooms can be more susceptible to common tomato diseases, which might be challenging to manage indoors.
2. Inconsistent Growth: They can be unpredictable in terms of size, yield, and even flavor, depending on the indoor environment.
3. Shorter Shelf Life: They typically don’t last as long once harvested, so you’ll need to use them up quickly.
4. Variable Yield: Some seasons might be bountiful, others not so much; heirlooms can be hit or miss.
5. Sensitive to Environmental Changes: Heirlooms often require more precise conditions in terms of light, temperature, and humidity, which might be harder to control indoors.
Hybrid Tomatoes:
Pros:
1. Disease Resistance: They’re tougher and less likely to succumb to common ailments.
2. Consistent Growth: You get what’s on the seed packet – no surprises.
3. Longer Shelf Life: They last longer after picking, giving you more time to enjoy.
4. Higher Yield: Generally, produce more fruit, which is great for indoor spaces.
5. Adaptable to Various Conditions: More forgiving if your indoor conditions aren’t perfect.
Cons:
1. Flavor Might Be Less Robust: Some say they can’t match the taste of heirlooms.
2. Seeds Can’t Be Saved: Hybrids don’t breed true, so you’ll need new seeds each year.
3. Less Variety in Appearance: They tend to look more uniform than heirlooms.
4. Possible Environmental Concerns: Some worry about the long-term impact of hybrid cultivation.
5. Dependent on Seed Suppliers: You’re at the mercy of what’s available commercially.
3. Manage Sunlight or Growing Light for Indoor Tomatoes
Alrighty, let’s shine some light on how much sun (or the artificial equivalent) your indoor tomatoes are hankering for:
Sunlight Needs for Indoor Tomatoes:
1. Six to Eight Hours a Day:
These sun-loving plants need plenty of light to thrive. Ideally, they should bask in about 6 to 8 hours of sunlight daily.
2. South-Facing Windows are Gold:
If you’ve got a window that gets full sun for most of the day, your tomato plants will be as happy as clams at high tide.
Artificial Light for Indoor Tomatoes (When Mr. Sun is playing hide-and-seek):
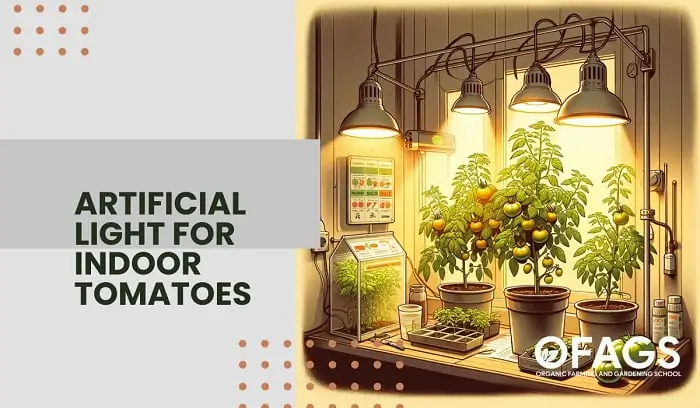
1. 14 to 18 Hours of Grow Light:
If natural sunlight is scarce, you’ll want to substitute with grow lights. Aim for about 14 to 18 hours of artificial light daily.
2. Choose the Right Bulbs:
Full-spectrum LED grow lights are a great choice. They mimic natural sunlight and are energy-efficient too.
3. Distance Matters:
Keep the lights about 1 to 2 feet above the plants. Too close and you might scorch your tomatoes; too far and they’ll stretch to reach the light.
4. Monitor and Adjust:
Keep an eye on your plants. If they’re stretching towards the light or looking a bit pale, they might be craving more rays.
In a nutshell, whether it’s soaking up rays by the window or basking in the glow of grow lights, making sure your indoor tomatoes get enough light is key to a bountiful harvest.
4. Transplanting Indoors Tomatoes
Transplanting tomatoes indoors is a bit like giving your plants a room upgrade as they grow. Here’s how to do it at different stages:
Transplanting from Seed Starting to First Pot
1. Wait for True Leaves:
Once your seedlings have their first set of true leaves (the ones after the initial sprouts), they’re ready for their first move.
2. Gentle Handling:
Carefully loosen the soil around the seedling and lift it by the leaves, not the stem. The stem is delicate and can be easily damaged.
3. Prepare the Pot:
Use a small pot (about 3-4 inches) filled with potting mix. Make a small hole in the center.
4. Planting Depth:
Place the seedling in the hole so that the lower leaves are just above the soil surface. This encourages a strong root system.
5. Water Well:
After transplanting, water the seedling to help settle the soil.
Related: How to transplant tomato seedlings safely
Moving to Larger Pots
1. When to Upsize:
When your plants are about 3-4 times the height of the pot, or roots start coming out of the drainage holes, it’s time for a bigger home.
2. Pot Size Increment:
Move them to a pot that’s a few inches larger. Going too big too soon can overwhelm the plant.
3. Similar Planting Process:
Just like the first transplant, handle gently, make a hole, and plant at a similar depth as before.
4. Support If Needed:
If the plant is tall or leggy, you might need to stake it for support.
Final Pot Before Flowering
1. Final Home:
Depending on the variety, your final pot size should be between 5-15 gallons. Larger is better, especially for indeterminate varieties.
2. Ample Room:
Ensure there’s enough space for the roots to grow. Crowded roots can stress the plant and reduce yield.
3. Steady Growth:
By now, your tomato plant should be sturdy. Transplant it with care, keeping the soil level consistent.
4. Add Support Structures:
If you haven’t already, add stakes or cages for support as the plant will get heavier with fruit.
Post-Flowering and Fruiting Stage
1. Less Likely to Transplant:
Usually, by this stage, transplanting isn’t recommended as it can stress the plant and affect fruit production.
2. Focus on Care:
Instead of transplanting, focus on providing adequate water, nutrients, and support.
General Transplanting Tips
1. Water Before Transplanting:
Water the plant a few hours before moving it. This helps the soil stick together and reduces root damage.
2. Handle with Care:
Always handle the plant gently during transplantation to avoid damaging the roots or stem.
3. Soil Quality:
Use a good-quality potting mix for the transplant. Avoid using garden soil as it may contain pathogens and doesn’t drain well in pots.
4. Post-Transplant Care:
After transplanting, keep the soil moist but not waterlogged. Monitor the plant for signs of stress and adjust care as needed.
5. Avoid Direct Sunlight Immediately After:
Keep the plant in a shaded area for a day or two post-transplant to reduce shock.
6. Fertilize After Settling:
Wait a week or so before applying fertilizer to give the plant time to recover from the transplant shock.
Transplanting is like giving your tomato plants a new lease on life at each growth stage. With a little care and attention, you can help them thrive in their new pots.
5. Picking the Perfect Potting Mix
Picking the right soil for your indoor tomatoes is like choosing the perfect mattress for a good night’s sleep. Here’s how to ensure your tomato plants are resting easy and growing happy:
Use a High-Quality Potting Mix:
1. Why Not Regular Ground Soil?
Ground soil might be too heavy and could contain pests and diseases. It doesn’t drain well in containers, which can spell trouble for your tomatoes’ roots.
2. The Perks of Potting Mix:
A good potting mix is like a fluffy pillow for roots. It’s light, drains well, and is free from outdoor soil issues.
Consider Going Organic:
1. Benefits of Organic Potting Mix:
It’s made with natural materials and often contains compost, which is like a superfood for your tomatoes.
2. No Synthetic Chemicals:
For those who want to keep it all-natural, organic mixes avoid synthetic fertilizers and pesticides.
Additional Tips to Select the Right Potting Mix
1. Look for Tomato-Specific or Vegetable Mixes:
Some potting mixes are formulated specifically for vegetables, ensuring the right nutrient balance for your tomato plants.
2. Avoid Waterlogged Roots:
The mix should be well-draining to keep roots healthy. Tomatoes don’t like wet feet!
3. Consider Adding Perlite or Vermiculite:
They help improve soil aeration and drainage – think of them as mini air pockets for roots to breathe and water to flow through.
4. Don’t Forget Compost:
Mixing in some compost gives your tomatoes a nutrient-rich environment to grow in. It can help with water retention and provide essential nutrients for your plants.
5. Regular Refreshing:
Over time, potting soil can become compacted or depleted of nutrients. Consider refreshing or replacing the soil each growing season.
6. pH Matters:
Tomatoes prefer a slightly acidic to neutral pH (around 6.0 to 6.8). You can find potting mixes with the right pH balance or adjust it yourself.
Choosing the right soil is a big part of setting your indoor tomatoes up for success. Think of it as creating a comfy, nutritious bed where they can stretch out their roots and flourish.
Related: How to make a homemade organic potting mix for tomatoes
6. Manage Water Supply Challenge for Indoor Tomatoes
Watering your indoor tomatoes is a bit like being a good bartender – you gotta know when to pour and when to hold back. Here’s the scoop on keeping your tomato plants perfectly quenched:
How Much Water Do Indoor Tomatoes Need?
1. Consistent Moisture is Key:
The soil should be kept evenly moist, but not soggy. Think damp sponge, not a wet mop.
2. Depends on the Pot Size:
Larger pots retain moisture longer, while smaller pots dry out faster.
How Often to Water Indoor Tomatoes:
1. No One-Size-Fits-All Schedule:
It varies depending on the temperature, humidity, and how much light they’re getting.
2. Check the Soil:
Stick your finger about an inch into the soil. If it feels dry at that depth, it’s time to water.
3. More Water during Fruiting:
When tomatoes start fruiting, they usually need more water due to increased growth.
What about Vacations?
1. Self-Watering Planters:
These can be a lifesaver if you’re away. They slowly release water as the plant needs it.
2. Get a Plant Sitter:
Like a pet sitter, but for plants. Ask a friend to water them while you’re away.
Water Only or Liquid Tomato Fertilizer?
1. Start with Water:
Regular watering is the foundation.
2. Supplement with Fertilizer:
Use a liquid tomato fertilizer every couple of weeks or as per the product’s instructions. Tomatoes are heavy feeders, especially during the fruiting stage.
3. But Not Too Much:
Over-fertilizing can be just as bad as under-fertilizing. Follow the guidelines on the fertilizer’s label.
Watch for Over or Under Watering Signs:
1. Wilting Leaves:
Can mean too much or too little water.
2. Yellowing Leaves:
Often a sign of overwatering.
3. Consistent Routine:
Try to water at the same time each day. Morning is usually best, as it sets the plant up for the day ahead.
4. Avoid Water on Leaves:
Aim for the soil, not the foliage. Wet leaves can lead to diseases like blight.
Remember, every indoor tomato plant is a bit different, so keep an eye on them and adjust as needed. They’ll let you know how they’re doing!
7. Manage Spilled Water in Potting Trays Indoors
Managing spilled water on pots is a bit like dealing with a mini-indoor flood. Here’s how to keep things shipshape:
1. Keep an Eye on Water Levels:
Check Regularly: Peek at those trays after watering. If they’re full, you might be overdoing it on the H2O.
2. Empty the Trays:
Don’t Let Water Sit: Standing water can lead to root rot or attract pests. If there’s excess water in the tray, empty it out.
3. Use Saucers or Trays with Raised Ridges:
Elevate the Pots: This helps prevent the roots from sitting in water. Think of it as putting your plants on little stilts.
4. Absorbent Materials Can Help:
Sponges or Cloths: Pop one in the tray to soak up extra water. Just remember to wring them out regularly.
5. Adjust Your Watering Technique:
Slow and Steady: Water your plants slowly to give the soil time to absorb the water, reducing overflow.
6. Consider Self-Watering Planters:
Controlled Watering: These planters have a reservoir system to prevent over-watering and spills.
7. Monitor Humidity Levels:
Extra Moisture: If your trays are often full, it might be adding to the humidity in your room, which isn’t always a bad thing for tomatoes. Just keep an eye on it.
8. Regular Cleaning:
Avoid Mold and Mildew: Clean the trays regularly to prevent buildup of mold or mildew.
9. Be Mindful with Fertilizer:
Fertilizer Runoff: If you’re using liquid fertilizer, it can end up in the tray. Too much buildup isn’t great for the plant.
10. Water-Resistant Surfaces:
Protect Your Floors: If you’re worried about spills, place your plant pots on a water-resistant surface or mat.
Remember, a little water management goes a long way in keeping your indoor tomato plants healthy and your home dry and tidy.
8. Ideal Temperature and Humidity
Ideal Temperature:
Daytime: Aim for around 65-75°F (18-24°C). Tomatoes like it warm but not too hot.
Nighttime: A slight dip to 60-65°F (15-18°C) is fine. They appreciate a bit of a cool-down at night.
Ideal Humidity:
40-60% Humidity: This range keeps them happy. Too dry, and they get stressed; too humid, and you’re inviting diseases.
Controlling Temperature for Indoor Tomatoes
Location, Location, Location:
1. Sunny Windows: A south-facing window is usually the warmest spot.
2. Away from Drafts: Keep them away from cold drafts or heat vents for consistent temps.
3. Monitor the Room Temperature: Keep a thermostat nearby to track the temperature.
4. Warm Their Roots: Seedling heating mats can be a game changer for germination and early growth.
5. More Heat in Winter: If your home gets chilly, consider using a small space heater (safely!) to keep the area warm.
Controlling Humidity for Indoor Tomatoes
1. Water + Pebbles: Place trays with water and pebbles under the pots. It increases humidity as the water evaporates.
2. Regular Spritz: Give them a gentle misting, but don’t overdo it. Too wet leaves can lead to fungal diseases.
3. Balance it Out: In extremely dry or humid conditions, use a dehumidifier or humidifier to maintain the ideal range.
4. Keep the Air Moving: A small fan can help circulate air and keep humidity levels in check.
5. Microclimate: Grouping plants together can create a mini-humid environment.
Remember, like any good spa, it’s all about balancing relaxation with the right environment. Keep an eye on your tomato plants, and they’ll let you know if they’re in their happy zone!
9. Feeding Indoor Tomatoes
Feeding your indoor tomato plants is similar to preparing a gourmet feast – each growth stage demands its distinct flavor of care. Here’s how to serve up the right nutrients at the right time:
Seed Bed Stage
Light on Nutrients:
Use a seed-starting mix that’s low in nutrients. Young seeds don’t need much to get going.
Moisture is Key:
Keep the soil consistently moist but not waterlogged.
Seedling Stage
First Fertilizer Application:
Once they develop their first true leaves, it’s time for a light feeding. Use a balanced, water-soluble fertilizer at half strength.
Gradual Increase:
As they grow, you can gradually increase the fertilizer concentration.
Before Flowering
Balanced Diet:
Switch to a balanced fertilizer, something like a 10-10-10 (NPK), to promote healthy growth.
Consistent Feeding:
Feed them every two weeks or as recommended by the fertilizer instructions.
After Flowering
Phosphorus Boost:
Use a fertilizer higher in phosphorus to encourage fruit development. Look for something like a 5-10-5 ratio.
Reduce Nitrogen:
Too much nitrogen at this stage can lead to more leaves and fewer fruits.
During Fruiting to Harvest
Potassium is Important:
Choose a fertilizer higher in potassium to support fruit ripening.
Continue Phosphorus:
Keep using a phosphorus-rich fertilizer to maintain fruit production.
Less Frequent but Consistent:
Fertilize every two to three weeks, but don’t overdo it. Over-fertilizing can harm your plants.
General Tips
Water Well Before and After Fertilizing:
This helps prevent root burn and ensures even distribution of nutrients.
Observe Your Plants:
They’ll tell you if they’re happy or need something more – yellow leaves can mean nutrient deficiencies.
Remember, feeding your indoor tomatoes is all about understanding their current needs and adjusting accordingly. Bon appétit, tomato style!
10. Tips to Pollinate Indoor Tomato Plants
Helping your indoor tomato plants pollinate is like being a wingman for your leafy friends. Let’s dive into how you can assist in their love story:
Manual Pollination Techniques
The Shake Method:
1. Gentle Vibrations:
Simply give the plant a gentle shake. This helps mimic the wind or bee vibrations that would occur outdoors.
2. Best Time:
Do this daily, preferably around midday when the pollen is most viable.
The Toothbrush Technique:
1. Electric Toothbrush:
Hold the back of an electric toothbrush against the tomato plant’s stem near the flower. The vibrations will release pollen.
2. No Toothbrush? No Problem:
A standard toothbrush can work too, but you’ll need to mimic the vibrations by hand.
Using a Cotton Swab or Paintbrush:
Touch the center of each flower with a cotton swab or small paintbrush to collect and transfer pollen from one flower to another.
Additional Tips
Fan Them:
Use a small fan to create airflow. This not only helps with pollination but also strengthens the plant stems.
Natural Breeze:
If possible, open a window to let in a natural breeze (weather permitting).
Warmth and Humidity:
Tomatoes pollinate best in warm (not hot) and moderately humid conditions. Keep your indoor environment in mind.
Observe Flowering:
Keep an eye on flowering patterns and start pollinating as soon as you see open flowers.
Don’t Overdo It:
You don’t need to be overly vigorous; gentle vibrations are enough.
Daily Routine:
Make it part of your daily plant care routine for the best results.
With a bit of effort, you’ll be on your way to successfully pollinating your indoor tomato plants.
11. Control Pests and Diseases for Indoor Tomatoes
Dealing with pests and diseases in your indoor tomato garden is a bit like being a plant detective – always on the lookout for trouble. Here’s how to keep your tomato plants healthy and happy:
Preventing Pests and Diseases
1. Start with Clean Soil and Pots:
Use sterilized potting mix and clean pots to prevent introducing pests or diseases.
2. Keep Them Healthy:
Strong, healthy plants are less susceptible to problems. Ensure they have proper light, water, and nutrients.
3. Good Air Circulation:
Use a small fan or keep the area ventilated. This helps prevent fungal diseases.
4. Regular Checks:
Inspect your plants regularly for early signs of pests or disease – catch ’em early!
Controlling Pests
1. Isolate Infected Plants:
If you spot pests, isolate the affected plant to prevent spread.
2. Manual Removal:
For pests like aphids, sometimes a gentle shower or hand-picking can do the trick.
3. Insecticidal Soap or Neem Oil:
These are safer options for indoor use. They can help control pests like spider mites and whiteflies.
4. Sticky Traps:
Use yellow sticky traps to catch flying pests like gnats.
Managing Diseases
1. Avoid Over-Watering:
Damp conditions can lead to fungal diseases. Let the soil dry out slightly between waterings.
2. Remove Affected Parts:
If you see diseased leaves or stems, remove them immediately.
3. Fungicides:
In some cases, you might need to use a fungicide. Look for ones safe for indoor use and follow instructions carefully.
4. Clean Tools:
Always clean your pruning shears or other tools after use to prevent spreading disease.
General Tips
1. Monitor Humidity:
Keep humidity levels in check. Too high, and you risk fungal diseases; too low, and some pests might thrive.
2. Don’t Overcrowd:
Give your tomato plants space. Overcrowded plants can create a haven for pests and diseases.
3. Healthy Pruning:
Regularly prune your plants to remove unnecessary leaves and stems, improving air circulation.
Remember, the key to controlling pests and diseases in indoor tomatoes is vigilance and prompt action. Keep those eyes peeled and those green thumbs ready!
Related: 7 Basic Reasons Behind Common Tomato Plant Problems
12. Harvesting
Plucking tomatoes from your indoor plants is like choosing the perfect moment to enjoy the fruits of your dedication. Let’s explore the art of harvesting, tailored to the diverse varieties and your unique taste preferences:
Harvesting Based on Tomato Varieties
Determinate (Bush) Varieties:
1. All at Once:
These guys tend to ripen their fruit all at the same time. Be ready for a big harvest.
2. Check for Ripeness:
When the color is even and rich, and the fruit is slightly soft, it’s time to pick.
Indeterminate (Vine) Varieties:
1. Steady Stream:
These plants produce fruit continuously. You’ll be picking tomatoes regularly.
2. Ripeness Indicator:
Similar to determinate, but since they ripen at different times, you’ll be harvesting over a longer period.
Harvesting Based on Personal Preference
1. For Fresh Eating Slightly Firmer:
If you like a firmer texture for salads or sandwiches, pick them when they’re just ripe but still have a bit of firmness.
2. For Cooking or Sauces Fully Ripened:
Let them get fully ripe on the vine for the sweetest and juiciest tomatoes – perfect for sauces and cooking.
General Harvesting Tips
1. Gentle Twist:
Use a gentle twisting motion to pull the tomato from the vine. This prevents damaging the plant.
2. Use Pruning Shears for Stubborn Stems:
If the tomato doesn’t come off easily, use a pair of clean pruning shears.
3. Check Regularly:
Especially in peak season, check your plants every day or two.
4. Don’t Refrigerate:
Keep harvested tomatoes at room temperature for the best flavor. The fridge can make them mealy.
5. Leave a Bit of Stem:
If you’re not using them right away, leaving a short piece of stem can prolong freshness.
6. Green Tomatoes:
If your season is ending, you can pick green tomatoes and let them ripen indoors. Place them in a paper bag with an apple or banana to speed up the process.
Harvesting your indoor tomatoes is a rewarding end to your gardening journey. Whether you’re after a big batch for sauce or just a few for your next meal, enjoy the fruits of your effort!
Conclusion:
Growing tomatoes indoors is like nurturing a bit of summertime right in your home. It’s all about choosing the right variety, keeping those plants well-fed and watered, and giving them enough light to thrive. With some clever pollination, vigilant pest control, and regular pruning, your indoor garden can yield a bounty of fresh, juicy tomatoes. It’s a delightful blend of care, patience, and green-thumb magic, turning any space into a vibrant, tomato-filled haven. Truly, indoor tomato gardening is a small slice of plant paradise!
Leave a Reply